How To Create an Ads Account on Facebook - A Quick Start Guide
29 Mar, 2024
Get started advertising on Meta quicker than ever with our quick-start guide. Learn how to create an ads account on Facebook and get up and running in no time

Jump to:
Hop on our weekly newsletter train! We're sharing tips so stellar, we're practically job-threatening ourselves!
Congrats on taking the first step toward growing your business through digital ads! You're about to embark on a digital adventure that could take your company to dizzying new heights.
With over 2.9 billion monthly active users, Facebook has become a virtual town square where people gather, interact, and make purchasing decisions. By tapping into this massive audience through Facebook Ads, you're opening the door to a world of opportunities for your business. Whether you're a local mom-and-pop shop or a global enterprise, Facebook Ads can help you reach your ideal customers with laser-sharp precision. 🎯
In this post, we'll guide you through the process of creating a Facebook Ads account step by step. From setting up your business page to configuring your account settings, we'll cover everything you need to know to get your ads up and running like a well-oiled machine. 🛠️
Step-by-Step Guide to Creating a Facebook Ads Account
Step 1: Set Up a Facebook Business Page
First things first, you'll need a Facebook Business Page to run your ads. 📣 Think of it as your company's virtual storefront, where you can showcase your products, services, and brand personality. This is where you will post all of your organic social content - from catchy reels to promotional posts.
To create your page, head over to Facebook's Create a Page section and follow the prompts. Choose your page type, fill in your business details, and don't forget to add a profile picture and cover photo that really capture your brand's essence. 📸👌
If you already have a business account for your business, you can skip this step. But know that it is a prereq for getting an ads account set up. If you are not an admin, editor or advertiser on the business page, you will need to request these permissions, otherwise you will not be able to continue with the following steps.
Step 2: Access Facebook Ads Manager
Now that you have your shiny new (or not new) business account, it's time to go into Facebook Ads Manager - this is where the magic happens.
To access Ads Manager:
Make sure you are logged into your business' business suite account. If you're not sure what that is, you can get there by clicking on this link. Alternatively, you can go to your Facebook news feed (while logged into your business account) and click on "Meta Business Suite." Note that the ad shortcuts will become present after you create an ads manager account.
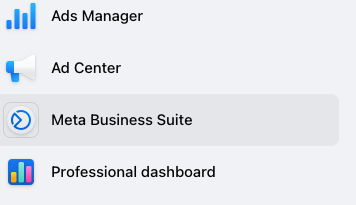
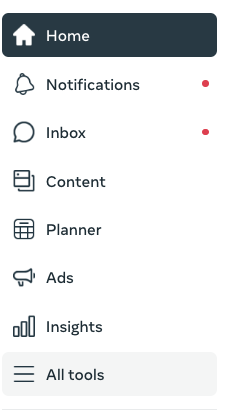
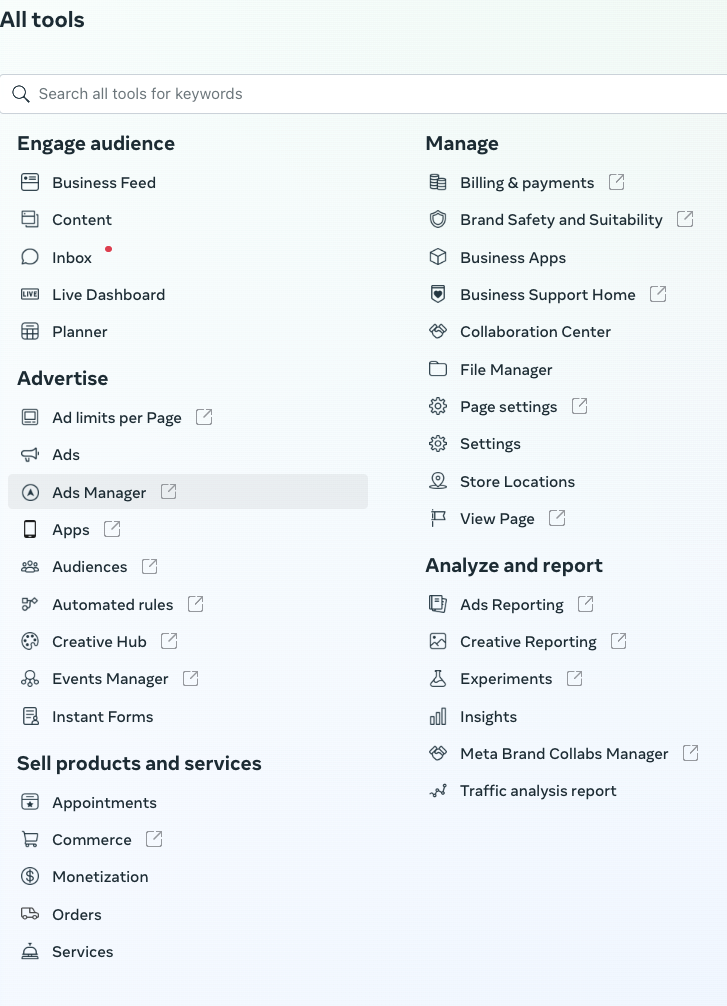
2. Now that you're in Business Suite, click on the hamburger menu at the bottom right of the menu that says "All Tools"
3. Select "Ads Manager" under the "Advertise" section
Step 3: Create Your Ad Account
Once you get to Ads Manager, Meta will give you three options: add an ad account, request access to an ad account, or create a new ad account. In this case, you will want to select "Create a New Ad Account" and follow the prompts.
Step 4: Configure Account Settings
With your ad account created, it's time to fine-tune those settings. 🎛️ This is where you'll set up your payment method and verify some core business details.
Step 5: Add People and Assign Roles
Last but not least, it's time to assemble your advertising dream team! 👥💼 If you're working with partners or colleagues, you can add them to your ad account and assign them specific roles. It's like giving them keys to different parts of your advertising castle. 🗝️🏰
To add people, navigate to the "Ad Account Roles" section in Ads Manager. From there, you can invite team members and choose their roles, such as Ad Account Admin or Ad Account Advertiser.
Troubleshooting Common Setup Issues
Alright, let's discuss those pesky problems that can pop up when setting up your Facebook Ads account. 😫 Don't worry, though—we've got your back!
Issue 1: Business Page Not Eligible for Ads
Sometimes, you might run into a roadblock where Facebook tells you your Business Page isn't eligible to run ads. 🚧 This can happen if your page is too new, doesn't have enough content, or violates Facebook's advertising policies.
Solution: Make sure your page has a clear profile picture, cover photo, and a few posts that showcase your business. It's like dressing up your page to impress the bouncer. 😎👔 Also, double-check that your page and its content comply with Facebook's ad policies. 📜✅
Issue 2: Payment Method Not Accepted
You're all set to launch your ad campaign, but suddenly your payment method is declined.
Solution: First, double-check that your payment details are correct and up-to-date. It's like making sure you have the right credit card in your wallet. 💳✅ If the issue persists, try adding a different payment method or contacting your bank to ensure there are no blocks on your account.
Other Essential Setup Items Before Running Your First Campaign
Now you're almost ready to hit the ground running with your new campaign. But beforehand, there are a few final touches needed for your advertising ensemble - they'll ensure you're looking sharp and ready to make a lasting impression. 😎👌 (no pun intended).
Set Up the Facebook Pixel
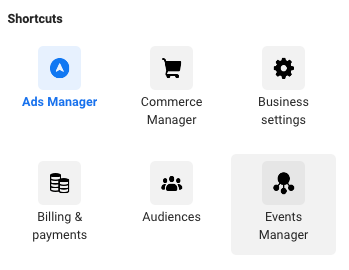
First up, let's talk about the Facebook Pixel. 🔍 This handy little tool tracks how people interact with your website after clicking on your ads. 🕵️♂️ It's essential for measuring conversions, optimizing your ads, and creating targeted audiences.
To set up the Facebook Pixel, head over to the Events Manager in your Facebook Ads
Implement the Conversions API
Next, let's talk about the Conversions API. 🔄 This powerful tool is now essential given the upcoming sunsetting of 3rd party cookies. Implementing the Conversions API involves a bit more technical setup, but it's worth the effort. You'll need to work with your web developer to set up server-side tracking, but once it's up and running, you'll have access to even more accurate and granular conversion data.
Create Custom Audiences
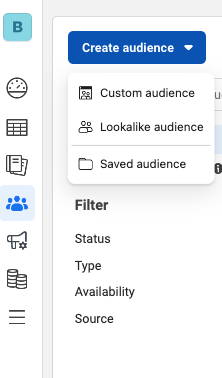
Now, let's talk about Custom Audiences. 🎯 They allow you to target people who have already interacted with your business. 💼🤝 By creating Custom Audiences, you can serve ads to people who have visited your website, engaged with your posts, or even shared their contact information with you.
To create a Custom Audience, head over to the Audiences section in your Facebook Ads account. From there, you can create audiences based on various criteria and use them to target your ads with laser precision.
Set Up Conversion Tracking
Last but not least, let's talk about setting up conversion tracking. 📊 This is like having a scorecard that tells you how well your ads are performing. 🏆📈 By defining and tracking specific actions that matter to your business (like purchases, sign-ups, or lead generation), you can measure the true impact of your advertising efforts.
To set up conversion tracking, head over to the Events Manager in your Facebook Ads account (yep, back there again.) From there, you can define your conversion events, set up tracking, and start measuring your success.
Conclusion
Phew, that was quite the journey through the world of Facebook Ads! 🌍🗺️ From setting up your Business Page to implementing advanced tracking tools, there's a lot to take in. But don't worry – you've got this! 💪😎
But let's be real – sometimes, all this talk of pixels, APIs, and custom audiences can feel a bit overwhelming. 😵💫 It's like trying to navigate a foreign city without a map – you might eventually reach your destination, but it could take a lot of wrong turns and frustration along the way.
That's where DriftLead comes in – think of us as your trusty tour guide in the world of Facebook Ads. 🧭🗺️ We've got the local knowledge, the insider tips, and the experience to help you make the most of your advertising journey.
So, if you're feeling a bit lost or overwhelmed, don't hesitate to reach out. We're here to help you chart a course to Facebook Ads success. 🌟💡 And the best part? We're offering a free marketing plan to help you get started on the right foot. Request yours to get started today!
